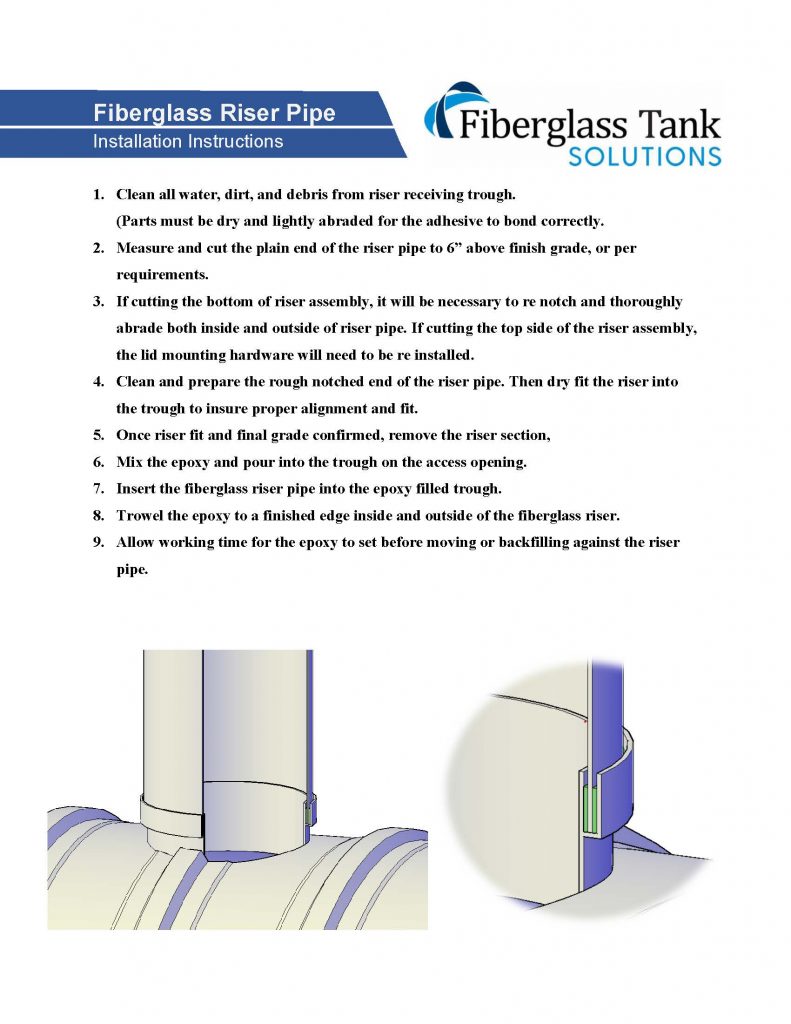
- Clean all water, dirt, and debris from riser receiving trough.
(Parts must be dry and lightly abraded for the adhesive to bond correctly. - Measure and cut the plain end of the riser pipe to 6” above finish grade, or per
requirements. - If cutting the bottom of riser assembly, it will be necessary to re notch and thoroughly
abrade both inside and outside of riser pipe. If cutting the top side of the riser assembly,
the lid mounting hardware will need to be re installed. - Clean and prepare the rough notched end of the riser pipe. Then dry fit the riser into
the trough to insure proper alignment and fit. - Once riser fit and final grade confirmed, remove the riser section,
- Mix the epoxy and pour into the trough on the access opening.
- Insert the fiberglass riser pipe into the epoxy filled trough.
- Trowel the epoxy to a finished edge inside and outside of the fiberglass riser.
- Allow working time for the epoxy to set before moving or backfilling against the riser
pipe.
